Drawing flowers can be a fun and relaxing way to practice your artistic skills. Whether you’re a beginner or looking to refine your drawing technique, a simple flower is a great subject to start with. In this article, we’ll guide you through a 6-minute step-by-step process to draw a beautiful flower, focusing on ease and simplicity while still creating a lovely and detailed piece. Let’s get started!
What You’ll Need:
- Paper – Any type of drawing paper works, but a smooth, textured surface is great for fine details.
- Pencil – A basic pencil (preferably HB or 2B) for sketching.
- Eraser – For adjustments and fine-tuning.
- Colored Pencils or Markers (optional) – For adding color to your flower.
- Ruler (optional) – For helping with symmetry, though it’s not essential for this simple flower.
Step 1: Draw the Center of the Flower (1 minute)
Start by creating the core of the flower, the pistil and stigma. This will be the focal point, and all the petals will emanate from it.
- Draw a small circle in the center of your page. This represents the center of the flower.
- Make sure it’s light enough to adjust later, as you’ll build from this point.
💡 Tip: For this step, don’t worry about making it perfect. The charm of a hand-drawn flower is in the natural imperfection!
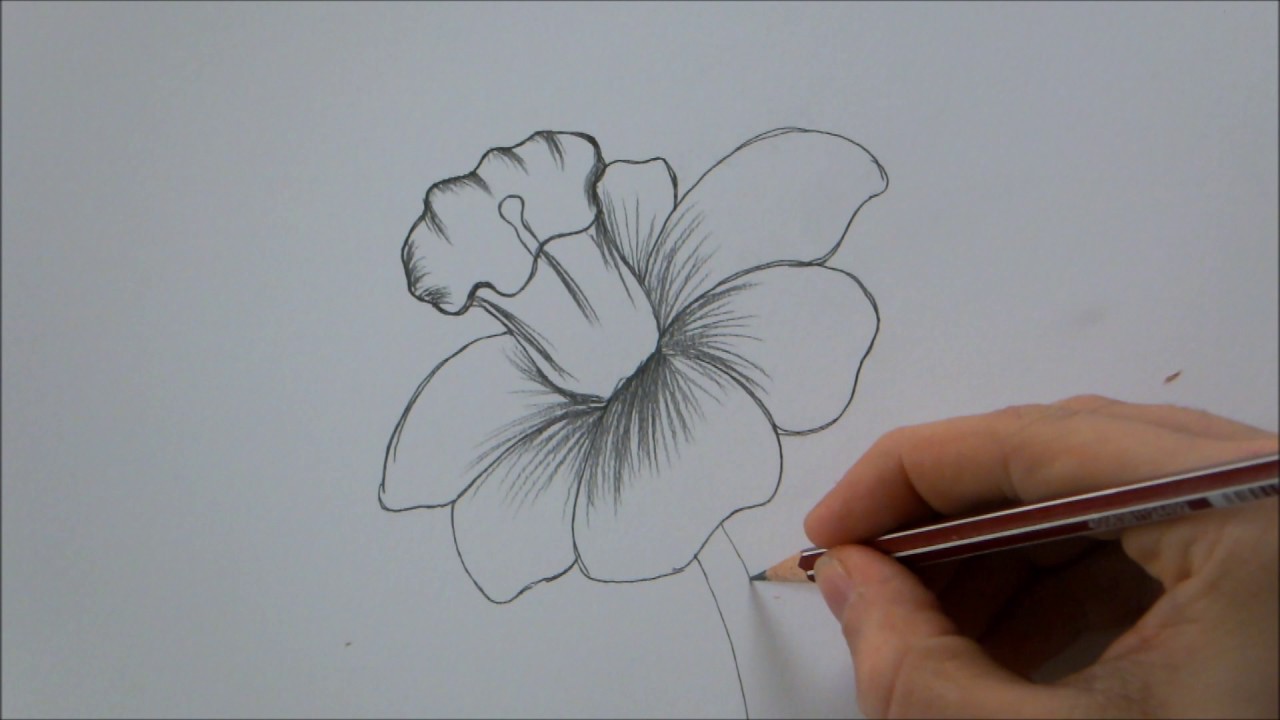
Step 2: Draw the Flower Petals (2 minutes)
Next, focus on drawing the petals that surround the center. You can create a flower with as few or as many petals as you like, but we will focus on a simple, 5-petal flower for a classic look.
- Start with the first petal: From the center circle, draw an elongated oval shape that curves outward and comes back to the circle. This should be the first petal, and the line should be soft and flowing.
- Repeat this process for the remaining four petals, ensuring they’re evenly spaced around the center. Overlap them slightly so that the edges of each petal touch, creating a natural flow.
- Keep your petals wide at the base near the center and gradually narrow out at the tips. Petals often have a slight curve, so add some variation to make them more organic.
💡 Tip: Don’t make every petal identical—flowers are naturally irregular, so adding a little asymmetry will make your drawing more realistic.
Step 3: Add Detail to the Petals (1 minute)
At this point, you’ve created the basic shape of the flower. To add depth and realism, now is the time to enhance the petals with detailing.
- Draw light, curving lines inside each petal to mimic the natural veins of a flower.
- Keep the lines subtle and don’t make them too long or harsh. These veins give the petals texture and help break up the flatness of the drawing.
- Add gentle curves at the edges of each petal to show how they’re bending and fluttering in the wind.
💡 Tip: Focus on the symmetry of the petals but allow for slight variations in shape and vein patterns to reflect nature’s imperfections.
Step 4: Outline the Flower (1 minute)
Now that your flower is beginning to take shape, it’s time to finalize the drawing with a clean outline.
- Go over your pencil lines with a darker pencil or fine pen.
- Make the edges of the petals crisp and clear while maintaining a smooth flow from the center.
- Add a few more details to the center of the flower, like small dots or short lines to represent the texture of the pistil. This gives the flower more dimension and makes it appear more detailed.
💡 Tip: Don’t rush through this step. A clean outline helps define the flower and makes your drawing stand out.
Step 5: Draw the Stem and Leaves (1 minute)
Now it’s time to complete the flower by adding a simple stem and leaves. This step is easy, but it gives your flower context and makes it feel complete.
- From the bottom of the flower, draw a straight or slightly curved line to form the stem. Make it as long as you like, but remember, the flower’s shape should dictate the length of the stem.
- Add a few leaves along the stem. Draw elongated oval shapes at an angle, with a pointed tip. Draw at least two leaves, one on either side of the stem, for balance.
- Add veins in each leaf by drawing two or three lines extending from the center vein. These lines should be subtle and curved, reflecting how veins appear in real leaves.
💡 Tip: Make sure the stem and leaves are not too thick or overpowering—let the flower be the focal point. Keep them light and flowing.
Step 6: Color the Flower (Optional – 1 minute)
If you want to add color to your flower, now is the time! Use colored pencils, markers, or even watercolor to bring your flower to life.
- Petals – Choose a color you like, such as pink, red, yellow, or purple, and lightly fill in the petals. Leave a little white space or use a slightly darker shade at the edges of the petals to create depth.
- Center – For the center, use shades of yellow, orange, or brown. Add light and dark tones to make it stand out and look more textured.
- Leaves and Stem – Use a variety of green tones for the leaves and stem. Darker greens for the veins and edges of the leaves, and a lighter green for the stem, will create a nice contrast.
💡 Tip: Layer your colors for a more realistic effect. Add light washes and gradually build up intensity as you go!
Final Thoughts
Congratulations—you’ve just drawn a simple yet beautiful flower in 6 minutes! Remember, the key to improving your drawing is practice. As you continue drawing, try experimenting with different types of flowers and adding more details to your sketches. With consistent practice, you’ll get faster and more skilled in capturing all kinds of flowers in your drawings.
Drawing can be a relaxing and creative outlet, so enjoy the process and don’t stress about perfection. Let each flower you draw be unique and full of character, and soon you’ll be drawing intricate bouquets in no time!