Drawing realistic eyes is a fundamental skill for any aspiring artist. Eyes are expressive and detailed, making them a crucial feature in portrait drawing. While they may seem complex at first, breaking them down into simple steps makes the process easier, even for beginners. This step-by-step tutorial will guide you through the basics of drawing an eye using a pencil, from sketching the initial shape to adding details and shading.
Materials You Will Need
Before starting, gather the following materials:
- A pencil (HB for sketching, 2B or 4B for shading)
- A kneaded eraser or a regular eraser
- A blending tool (tissue, cotton swab, or blending stump)
- A white gel pen or eraser pencil (for highlights)
- A sketchbook or drawing paper
Now, let’s move on to the step-by-step process of drawing an eye.
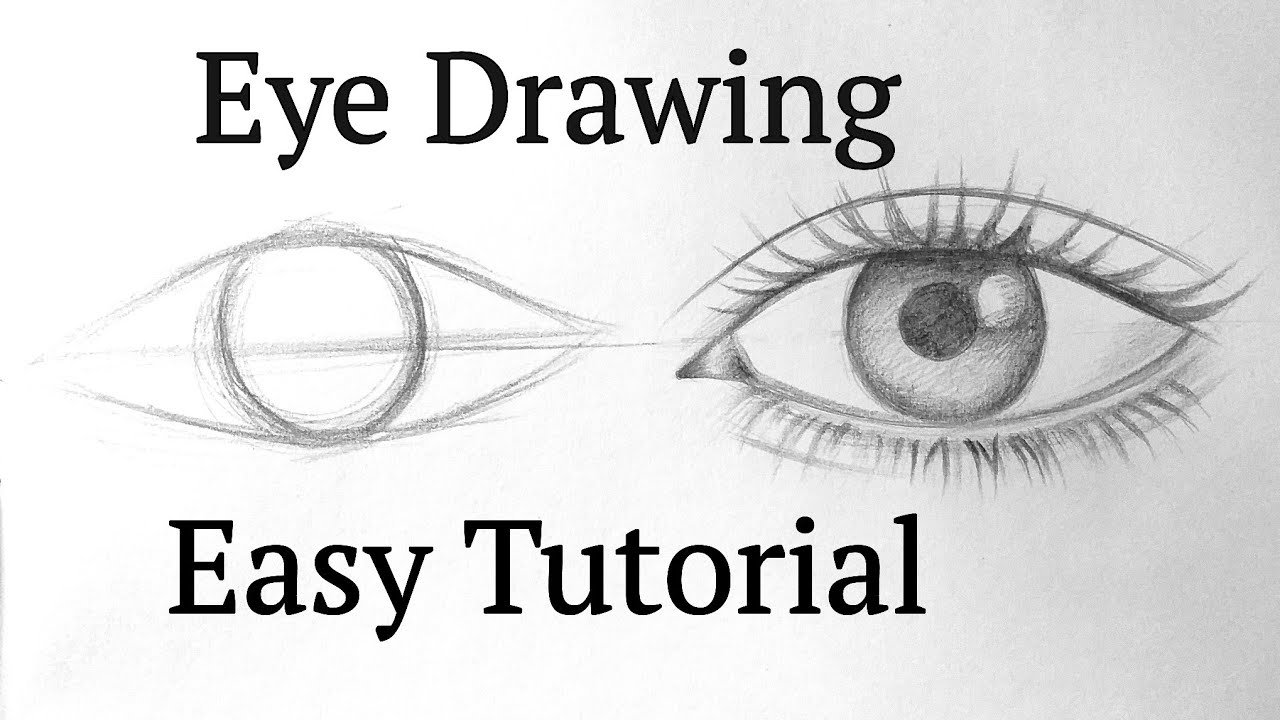
Step 1: Draw the Basic Eye Shape
Begin by lightly sketching an almond-shaped outline. The upper eyelid should be slightly curved, while the lower lid should be less curved. Do not press too hard with your pencil—keep your lines light so they can be adjusted later.
If you’re struggling with symmetry, try drawing a horizontal guideline to ensure both sides of the eye are balanced.
Step 2: Sketch the Iris and Pupil
Inside the eye shape, draw a circle for the iris. Keep in mind that part of the iris is often covered by the upper and lower eyelids, so you may not see the entire circle.
In the center of the iris, draw a smaller circle for the pupil. The pupil is always darker than the iris and should be placed precisely in the middle.
Step 3: Add the Eyelids and Tear Duct
Refine the eyelids by adding thickness to the upper and lower edges. The upper eyelid typically has a thicker crease, while the lower eyelid is subtler.
Next, sketch a small curve at the inner corner of the eye to form the tear duct. This small detail helps make the drawing look more realistic.
Step 4: Outline the Eyelashes
Draw short, light strokes along the eyelids to indicate where the eyelashes will go. Eyelashes naturally curve outward, and they are thicker and longer on the upper eyelid. The lower eyelashes are shorter and sparser. Avoid drawing them straight or evenly spaced—natural eyelashes vary in length and direction.
Step 5: Shade the Iris and Pupil
Now it’s time to add shading to make the eye appear more three-dimensional:
- Darken the pupil completely using a 4B or darker pencil.
- Add texture to the iris by drawing radiating lines from the pupil outward. The iris contains tiny fibers, so short, curved strokes work best.
- Leave a small highlight (a white spot) in the iris. This represents light reflection and gives the eye a realistic, glossy look.
Step 6: Shade the White of the Eye
Many beginners leave the sclera (white of the eye) completely blank, but in reality, it has subtle shadows. Lightly shade around the edges of the eye, especially under the upper eyelid and near the tear duct. Use a blending tool to soften these shadows.
Step 7: Add Depth to the Eyelids
Shade the upper eyelid to show its natural fold. Darken the crease, but keep the shading soft and blended. The lower eyelid also has slight shading, especially right beneath the lashes.
For a more lifelike effect, lightly blend the shadows using a tissue or blending stump. Avoid harsh lines—gradual shading is key.
Step 8: Draw Realistic Eyelashes
Now, go back to your eyelash guidelines and add more defined lashes:
- Use a quick flicking motion to create curved, tapering lashes.
- Make the lashes overlap and vary in length for a natural look.
- The upper eyelashes should be darker and denser, while the lower lashes should be finer and lighter.
Step 9: Refine and Add Highlights
To make the drawing pop, use an eraser or a white gel pen to add small highlights:
- Brighten the highlight in the iris to make the eye appear wet and reflective.
- Erase tiny strands in the iris for added depth.
- Lightly erase parts of the lower eyelid to create a soft, realistic transition.
Step 10: Final Touches
Go over the entire drawing and adjust the shading as needed. If any areas look too harsh, blend them out. If the eye needs more contrast, darken the shadows.
Check the symmetry and proportions before finishing. If something looks off, lightly erase and redraw.
Additional Tips for Beginners
- Start Light: Always begin with light lines so you can erase mistakes easily.
- Observe Real Eyes: Use a mirror or reference photos to study real eyes.
- Blend Carefully: Avoid smudging too much—retain some texture for a natural look.
- Practice Different Eye Shapes: Experiment with different sizes and angles to improve your skills.
- Use Layers: Build up shading gradually instead of applying dark tones immediately.
Conclusion
Drawing realistic eyes can seem challenging at first, but by following these simple steps, you can create a beautiful and expressive eye drawing. The key is to observe details, practice shading, and be patient with yourself.
With regular practice, your eye drawings will become more realistic and refined. Grab your pencil and start sketching—happy drawing!