Eye makeup can completely transform your look, enhancing your natural beauty and making your eyes stand out. However, if you’re new to makeup, applying eyeshadow can feel overwhelming. The key to mastering eye makeup is understanding the parts of the eye and learning basic eyeshadow techniques that work for your eye shape.
In this beginner-friendly tutorial, we’ll break everything down step by step, from understanding eye anatomy to applying eyeshadow like a pro!
Understanding the Parts of the Eye
Before applying eyeshadow, it’s important to know the different parts of the eye where makeup is applied:
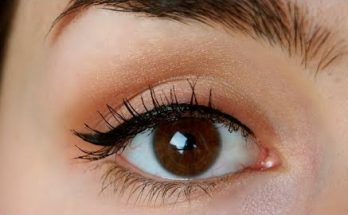
- Brow Bone – The area just below your eyebrow. Lighter shades or highlighter are applied here to create a lifted effect.
- Crease – The natural fold above your eyelid. This is where darker eyeshadow shades add depth and dimension.
- Eyelid – The main surface of your eye where the base or primary eyeshadow color is applied.
- Outer Corner (Outer V) – The outermost part of the eyelid where darker shades are placed to create definition.
- Inner Corner – The small area near the tear duct where a light or shimmery shade brightens the eyes.
- Lower Lash Line – The area below your lower lashes where eyeliner or eyeshadow can be applied for added definition.
Now that you know the parts of the eye, let’s dive into applying eyeshadow step by step!
Step 1: Prepping the Eyes
Just like with face makeup, prepping your eyes helps your eyeshadow last longer and look more vibrant.
✅ Apply an Eye Primer – This prevents creasing and keeps your eyeshadow in place all day.
✅ Use a Concealer (Optional) – If you have dark eyelids, applying a light concealer helps even out the skin tone.
✅ Set with Translucent Powder – This makes blending easier and prevents patchy application.
Step 2: Choosing the Right Eyeshadow Colors
For beginners, it’s best to start with neutral shades before experimenting with bold colors. A simple three-shade palette includes:
🎨 Light Shade – Used for highlighting (brow bone & inner corner).
🎨 Medium Shade – Used for transition and blending (crease & eyelid).
🎨 Dark Shade – Used for depth and definition (outer corner & lower lash line).
If you’re unsure which colors to choose, warm browns, soft pinks, and taupes are great for natural looks.
Step 3: Applying Eyeshadow Step by Step
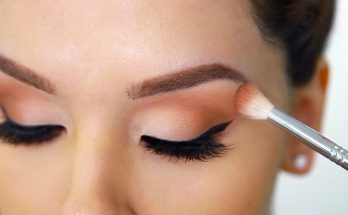
1. Apply a Transition Shade in the Crease
- Use a fluffy blending brush to apply a medium-toned shade in the crease.
- Start from the outer corner and blend in windshield wiper motions to soften harsh lines.
- This step creates a smooth transition between your lid and brow bone.
2. Add a Light Shade to the Eyelid
- Use a flat shader brush to pat a light or shimmer shade onto your eyelid.
- This brightens the eyes and makes them look more open.
- You can use your finger for a more intense shimmer application.
3. Deepen the Outer Corner
- Take a small blending brush and apply a darker shade to the outer V of the eyelid.
- Blend softly to add depth without harsh lines.
- Avoid going too far into the crease—keep it focused on the outer area.
4. Highlight the Inner Corner and Brow Bone
- Apply a light, shimmery shade to the inner corners to brighten your eyes.
- A small amount of highlighter on the brow bone lifts the eyes.
5. Define the Lower Lash Line
- Use a small pencil brush to apply the same crease shade under your lower lashes.
- This creates a balanced, professional look.
Step 4: Finishing Touches
To complete your eye makeup, don’t forget these final steps:
✅ Eyeliner (Optional): A thin line of brown or black eyeliner along the upper lash line defines the eyes. A winged liner adds a dramatic touch.
✅ Mascara: Curl your lashes and apply two coats of mascara for fuller, longer-looking lashes.
✅ False Lashes (Optional): If you want a glam look, apply natural-looking false lashes for extra volume.
Beginner-Friendly Eyeshadow Tips
✨ Blend, Blend, Blend! – Blending is the key to seamless eyeshadow. Use soft circular motions to avoid harsh lines.
✨ Start Light & Build Up Color – It’s easier to add more pigment than to remove excess product.
✨ Use Matte Shades for Natural Looks & Shimmers for Glam – A matte crease shade makes blending effortless, while shimmer adds sparkle.
✨ Choose Brushes Wisely – A fluffy brush blends, a flat brush packs on color, and a small brush defines details.
Final Thoughts
Mastering eye makeup takes practice, but by understanding the parts of the eye, choosing the right eyeshadow shades, and following a simple application technique, you’ll quickly improve your skills!
For beginners, start with neutral colors, blend carefully, and build confidence with each application. Soon, you’ll be experimenting with smoky eyes, colorful looks, and advanced techniques like a pro!
Now go ahead—grab your eyeshadow palette and start practicing!